|
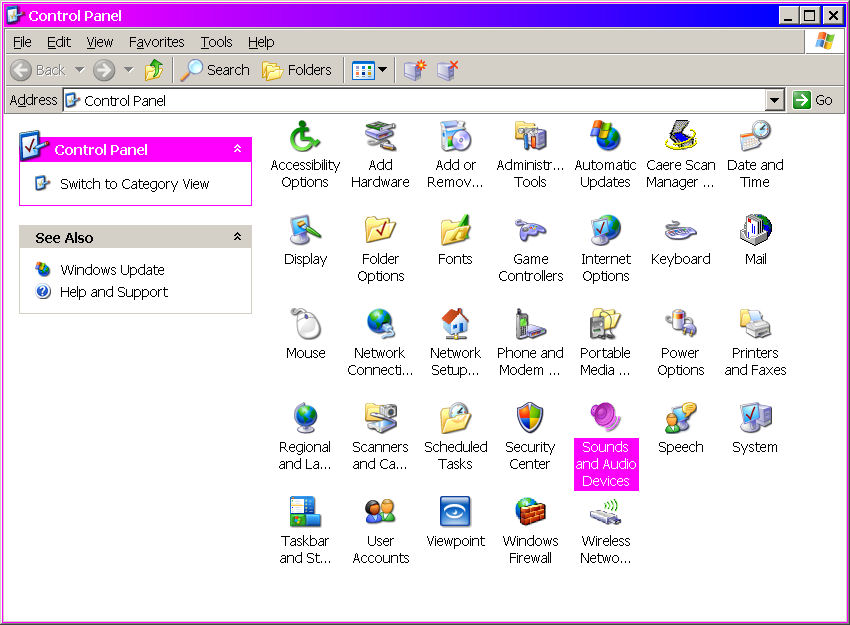
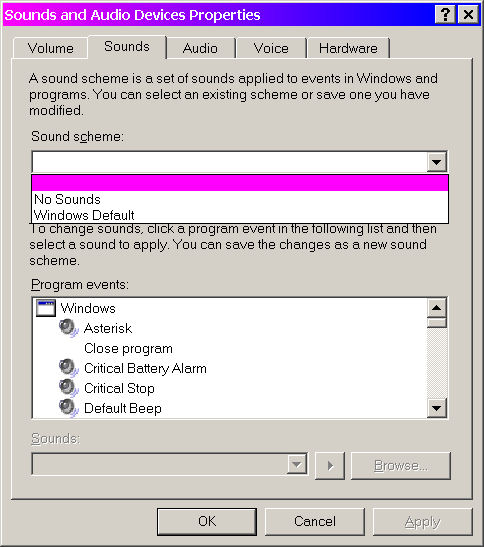
The first thing to do is configure your sound card not to emit any sounds during window type of operations. Such as the mouse clicks, the starting of windows, exiting windows and etc.... You do not want these sounds to be transmitted over the radio when these operations occur. Go to the Control Panel and select "Sounds and Audio Devices:" option. A dialog box will appear that looks similar to the one below. Select the "Sounds" tab to access the sound scheme portion of the dialog box. This section of the dialog box controls all those beeps, bells and whistles that are emitted from your computer that gives you the sound effects while certain operations are performed by your computer. What you will want to change is within the "Sound Scheme" drop down box. The example below list only two options but yours could list more. The only one that you have any interest in during digital or EchoLink operations is the "No Sounds" option. This will silence your computer and allow your programs such as PSK31 or EchoLink to operate with out this interference. Select the "No Sounds" option and the OK button at the bottom to activate.
|

|
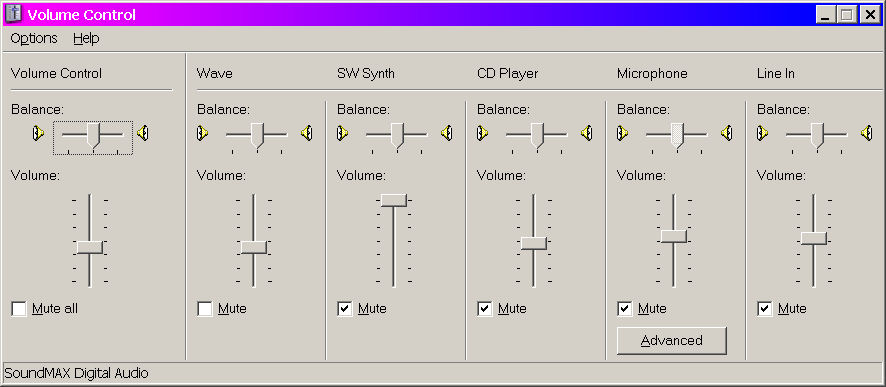
Now that we have windows quiet and will no longer output these obnoxious sounds out onto the airwaves. Lets configure our audio paths using the computer volume controls. The bottom right hand corner of the task bar you should see a small Task Tray that has a icon that looks like a speaker. The Task Tray presented here will not look identical to the one that is displayed on your screen. We are just interested in the speaker icon only. Double click on this icon and you should see something similar to the Volume Control Dialog below.
|

|
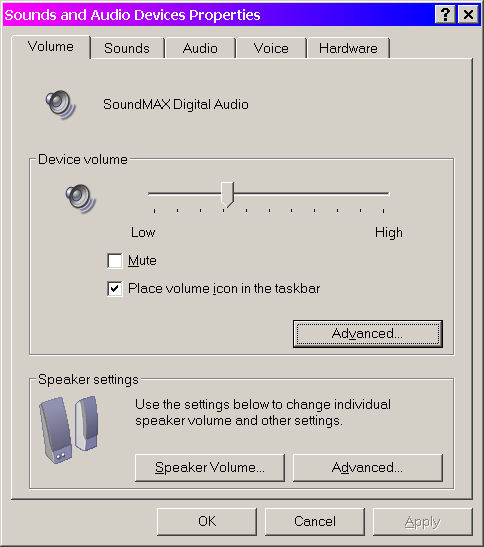
If you can not find a speaker icon don't panic. Go back to the Control Panel and select the Sounds and Audio Devices Properties Icon again. Inside the Device volume rectangle you will see a Advanced... button. Click this once and it will bring up the Volume Control Dialog. Next time to help speed access to the Volume Control Dialog you might want to check "Place volume icon in the taskbar" option and then click Apply prior to clicking the Advanced.... button.
|
|
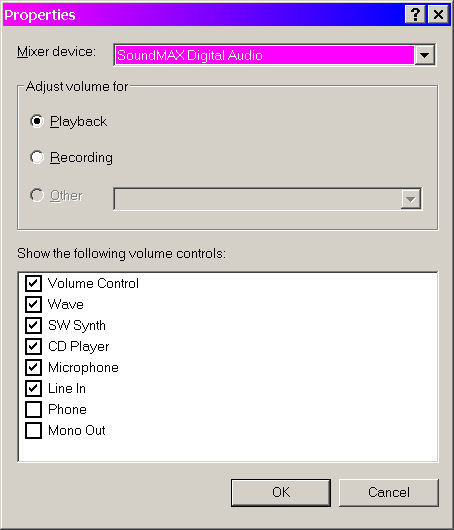
Your volume control dialog may have more or less devices which will not look identical to this one. Mute all devices except for the Wave device and the Master Volume controls. These two controls will determine how loud your audio is that will be transmitted and works in series to form the final output. What this means is what ever the volume level that is set by Wave control can be made louder by adjusting the Master Volume level. So as a starting point adjust the Wave control and the Master control just below mid level. These will have to be fined tuned later for the best results starting with the Master Volume control. Beware that a lot of laptops have built in microphones and will be combined with the audio while the radio is transmitting. Click the "Options" menu selection so to be sure that all other devices you have are displayed and are not hidden. The drop down menu will have a "Properties " selection. Select this option and the following dialog box will appear.
|
|
As you can see in the above dialog box that not all the devices are being displayed in the Volume Control dialog box. In this example we would check all the remaining check boxes that are not enabled. Then select the "OK" button and repeat the previous step until all the devices have been muted. When all the devices have been correctly configured we will move to the next step.
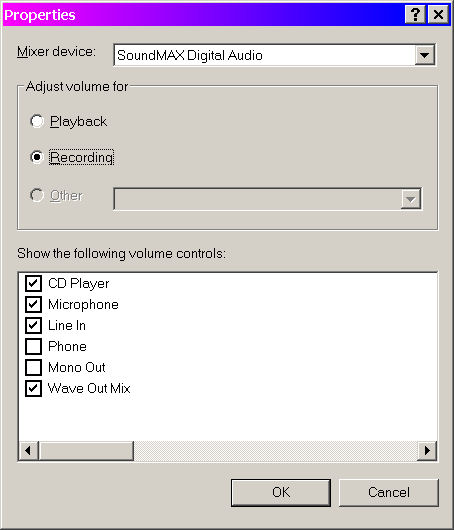
Once all the devices under the "Playback" mode are configured, select the "Recording" option within the above Properties dialog box. A new set of devices will appear within the dialog window. Be sure they are all selected and press the "OK" button so the audio from the radio can be adjusted.
|
|
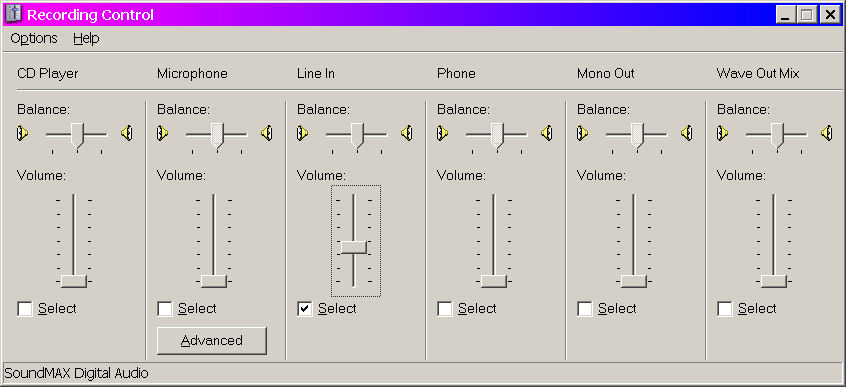
The Recording Control dialog window is our final step to configure our computer for EchoLink or Digital operations. Here we just want to select the device that we will use for our input audio from the radio.
|
|
Our final step is to select the "Line In" device and set the volume control just below mid-level. This may have to be adjusted again later for best results.
|